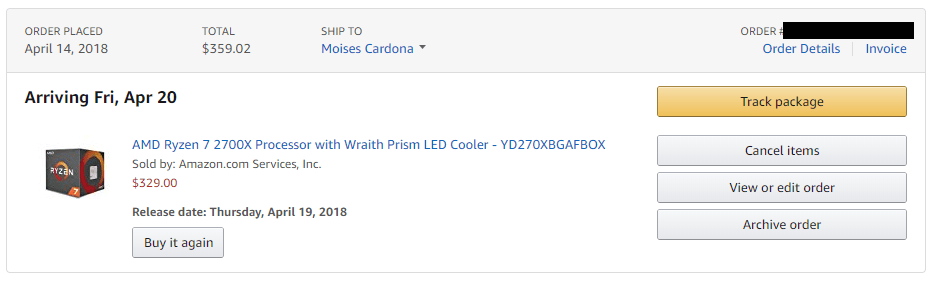
I have preordered the AMD Ryzen 7 2700X CPU to upgrade my AMD 1700 build. This will provide me a better performance increase as I’m running the CPU at stock speeds, up to 3.20Ghz.
The AMD Ryzen 7 2700X CPU runs at 3.7Ghz base speeds with Precision Boost going up to 4.3Ghz. It is a very nice speed boost compared to my 1700 CPU and considering I was overclocking it to 3.6Ghz, but I had to reverse it because of stability issues.
As far as the motherboard, new X370 boards are expensive, at $200+, so I’ll keep using my B350M which cost only $70 dollars when it was released. If new B450 boards are released, then I may consider upgrading it. The benefit of getting a new one is that I will then be able to run 2 AMD Ryzen machines for a total of up to 16 Zen cores and 32 total threads.
Now, I don’t expect to receive this on Friday, but who knows! Last year this was a total pain. First, I received my AMD 1700 CPU and some weeks later I received the motherboard. I hope this time the CPU actually gets released the 19 and Amazon has enough stock to ship it to me.
I’ll keep you all updated!
What was making my AMD Ryzen CPU temperature high?
The real issue was not the cooling, but the vcore applied to the CPU,
In the past, the BIOS was set to Auto vcore, and it was applying 1.36V of vcore, which was making the CPU temperature skyrocket to the 80C almost 90C:
Now, In the BIOS, I set the vcore voltaje via offset, meaning that the BIOS applies the CPU stock voltage of 1.18V plus or minus a value I add to it. In my case, I applied a +0.02 offset, and now my CPU is running stable at 3.6Ghz (same x36 multiplier) with a vcore of 1.21V. It now works between 1.19v and 1.21v where before it was using 1.35v to 1.37v. The temperature went down significantly!
Today, I performed some hardware upgrades to my computers.
First, on my Ryzen PC, which was getting temperatures of 84C all the way to 89C, I replaced the front 120mm fan, which was an Arctic F12, with a 120mm x 38mm high airflow but very noisy fan I took out from a Dell PC. This fan was placed on the CPU heatsink, so I tough on using it on my new Ryzen CPU as it could definitely lower the temps, and it did! My PC is now running between 78C to 84C on a tropical sunny day, so when it is cold or the air conditioner is turned on, these temps will definitely go down. Also, remember these temperatures are with both the CPU and GPU running the Distributed Computing software called BOINC, which uses the CPU and GPU to its maximum potential. Also, the CPU is overclocked to 3.6Ghz on all cores:
Another change I did was to setup the back fan as intake. This is because the front fan is so powerful that it wasn’t working as expected as exhaust. It was taking very little air out of the case and before it took out more air, so setting it as intake definitely helps here:
These are the new temperatures:
Lastly, I changed the 80mm fan I was using in the side window with the Arctic F12 I took out from the front 120mm slot. This one is also set as Intake. This way, the air blows directly to the AMD Wraith Spire cooler and also helps cool a little more the motherboard:
Going forward, on my PC running an Intel i7-3610QM in the Mini-ITX motherboard, I added ATI Radeon HD 2400 GPU from the same Dell system. The reason why I added this GPU was that this system was the one that had the Nvidia Geforce GTX 1060, which I’m now using in the AMD Ryzen PC. Because of this, the Intel PC has been running with the Intel HD Graphics, and since the PCI Express slot was empty, I added this GPU to it. Now it is working with both GPUs and running SETI@Home on the Intel GPU while running Moo! Wrapper on the ATI GPU:
So that’s all I’ve done with the PCs for today. Hope you enjoyed seeing all these images!!
AMD Ryzen 7 and Nero Video 2017. A Look at Performace
Today, I’m sharing my experience with Nero Video 2017 on my AMD Ryzen 7 PC.
So far, I’m not pleased with the performance Nero Video is having on this PC. The issue seems to be that the software is coded to use just a few cores or threads instead of using every core and thread of the CPU. I can get to this conclusion as on my Intel i7 PC, it manages to use like 80% of the CPU. Here on Ryzen, it is using between 30 to 40% for an MPEG-4 Blu-Ray encoding. This is a CPU encoding process, so the GPU isn’t being used except when it renders the menus. It seems Menu generation is OpenCL accelerated.
Here, I’m encoding some videos from a robotics event from 2015 I recorded (here is the playlist), being converted to Blu-Ray files using the MPEG4 codec:
Now, take a look at the Task Manager:
Let’s take a look at the processes view:
So yeah… The Nero Video software needs serious optimizations for the AMD Ryzen chips. At this stage, it takes the same amount of time to do the render on my Intel i7-3610QM PC which is a CPU from 2012… We are now in 2017… I really hope Nero fixes it so it can use the full potential of this PC:
Yesterday night, I was playing with the motherboard BIOS and overclocked my CPU to 3.6Ghz, using a multiplier of x36. Voltage is set to Auto and it is currently using 1.36v, although CPU-Z reports weird readings of 1.94 and 2.000V, which are incorrect readings.
Here is a benchmark from Cinebench and CPU-Z. Below you can see my current system specs:
Cinebench:
CPU-Z Bench:
CPU-Z System Information:
HWiNFO:
About the temperatures, I’m using the Stock Cooler and running BOINC which uses all cores and threads and also the GPU to 100%. That’s why HWiNFO reports 100% load on every core and thread:
The system is running stable. No crashes, no shut downs. It is perfectly stable!
Today, I ran a benchmark for the distributed.net client on my new AMD Ryzen 7 1700 running at 3.30Ghz. The PC has a 16GB Crucial Ballistix 2400Mhz RAM module.
Today has been a special day for me as I finally received my ASUS PRIME B350M motherboard. The CPU I got is the AMD Ryzen 7 1700.
Let’s take a look at the motherboard:
The motherboard came in this box:
Let’s see some more images:
When I opened the box, there was the motherboard:
When I took the motherboard out, we can see it came with 2 SATA cable, the M.2 screw, the backplate, the instruction manual and a driver CD (but I downloaded the drivers from the ASUS website):
Finally, here we can see the motherboard out of the Anti Static Bag:
The CPU
Opening the AMD Ryzen 7 1700 box, we find this:
Opening the AMD Wraith Spire cooler box:
We can see that the cooler came with preapplied thermal paste:
I forgot to take pictures of the motherboard with the CPU and fan installed, but you’ll see the full build below XD.
The RAM
The RAM I’m using is a 16GB Crucial Ballistix DDR4 2400Mhz:
The GPU:
I’m using and Nvidia Geforce GTX 1060 3GB. This one:
The fans:
The fans are an Arctic F8, Arctic F12 and the stock cooler
The Power Supply:
The PSU is an EVGA 600W.
The Optical Units:
The optical units are both Lite-On. A Lite-On iHAS524 with SmartErase and LabelTag, and an iHBS112 which is a Blu-Ray drive.
The Hard Disk:
I’m currently using a Western Digital 1TB hard disk drive. I will later upgrade to a Solid State disk.
This is how the front of the PC looks:
The cable you see there is the power cable. I had to take out the front panel because the fan could not get enough air. Without the front panel, there is more airflow.
The built PC:
This is the final result:
Configuration:
I chose the ASUS High Performance profile in the BIOS. This boosted the CPU from the stock 3.00Ghz to 3.30Ghz.
Benchmark:
Here is a multi-threaded benchmark:
Running BOINC:
BOINC is a software used to participate in Distributed Computing projects and it a perfect software to put the CPU into stress, as it will utilize 100% of the CPU if set to use 100% of the system resources.
Here you can see BOINC using the 16 CPU threads:
Here you can see the Task Manager showing 100% of CPU usage:
And finally, here is the temperature:
I’ll do some rendering tests later by using CyberLink PowerDirector and Nero Video, which are the softwares I use to produce videos.
I hope you enjoyed reading and watching the images in this article! Let me know if you own a Ryzen CPU, what motherboard you have and if it works great for you 🙂
In this post, I will be sharing some photos I took from the AMD Ryzen 7 1700 Box. I still haven’t unboxed it as I’m still waiting for the motherboard which should be delivered to me on Monday.
As I told you yesterday, today the AMD Ryzen 7 1700 CPU will be shipped, meaning I will get it tomorrow. There is still a motherboard shortage but my estimate for the motherboard is still showing delivery by next week as of today morning, so it seems I’ll be able to build my Ryzen system by next week.
I’m gonna take some pictures of the CPU once I receive it, so look forward to it!
This website uses cookies to improve your experience. We'll assume you're ok with this, but you can opt-out if you wish.AcceptRead More
Privacy & Cookies Policy
Privacy Overview
This website uses cookies to improve your experience while you navigate through the website. Out of these, the cookies that are categorized as necessary are stored on your browser as they are essential for the working of basic functionalities of the website. We also use third-party cookies that help us analyze and understand how you use this website. These cookies will be stored in your browser only with your consent. You also have the option to opt-out of these cookies. But opting out of some of these cookies may affect your browsing experience.
Necessary cookies are absolutely essential for the website to function properly. This category only includes cookies that ensures basic functionalities and security features of the website. These cookies do not store any personal information.
Any cookies that may not be particularly necessary for the website to function and is used specifically to collect user personal data via analytics, ads, other embedded contents are termed as non-necessary cookies. It is mandatory to procure user consent prior to running these cookies on your website.